I don't really post tutorials, and I'm not about to break that streak.
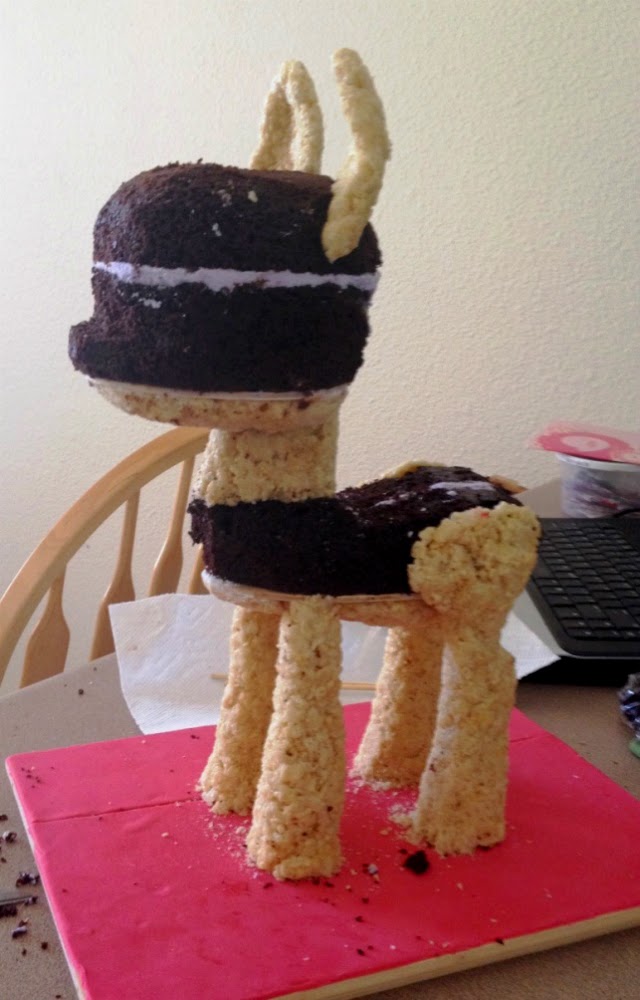
This is more like a post that happens to have progress shots, because I'm sure you're pretty curious.
I've been wanting to make a My Little Pony cake for my oldest daughter's birthday since two birthdays ago, but 1) I didn't have the time to, and 2) I didn't have the experience. So this year I finally did it.
Obviously, to make a standing, sculpted cake, you need something to support it. Originally I was going to use PVC piping, but even the smallest widths were too big. I didn't need to make a big cake because it was just me and my daughter eating it. I used wooden dowels instead.
I used a dense-ish double chocolate cake (which tasted amazing) for the body and head, since they're the biggest parts. I then used rice crispy treats for the legs, neck, and ears, and I also used them for the bottom of the body and head.
The buttercream is purple just because that's what I had leftover from making her entire class cupcakes. I only made a double batch, but it was still more than enough. (48 cupcakes and a pony. Oy!)
To even everything out, the bumps and whatnot, I covered the entire thing in a thin layer of buttercream. I personally don't like a lot of frosting, otherwise I would've added more.
I used a 50/50 mix of purple modeling chocolate and white fondant to achieve the color that I wanted. The detail - her cutie mark, eyes, and hair - were cut out of varying ratios of fondant and modeling chocolate.
I hope you enjoyed seeing my few progress shots. I also hope it inspires you in case you ever need to do something like this. Feel free to post any questions. Obviously I left a lot to the imagination, not because I don't want to reveal my "secrets," but because I believe true art comes from instinct and imagination. Plus, if a first-time cake sculptor can figure out how to turn a 2D pony into a 3D cake, I'm sure you wonderfully talented, much more experienced, and good-looking cake artists can figure it out, too. ;)

.JPG)


